


Installing a rectangular preformed pool: step-by-step installation for straight walls and a perfectly level surface
A rectangular preformed pond is the choice for contemporary gardens: clean lines, reflections, and a water feature that interacts with the patio. It is also the most demanding shape to install. On a round pond, a one-centimeter leveling error goes unnoticed. On a two-meter rectangle, it is immediately obvious along the edge. And unlike curved walls, straight walls tend to deform under the pressure of the soil if the backfill is not done properly.
— The short answer
Dig 10 to 15 cm wider than the shell on each side and 5 to 10 cm deeper, reproducing the steps. Lay a perfectly level sand bed. Check the level lengthwise, widthwise, and diagonally. Then fill the shell with water in stages of 10 to 20 cm while backfilling with moistened sand at the same rate, so that the pressure is balanced on both sides of the straight walls. Finish the edges on an independent support.

Before digging: choosing the location
A rectangular pond almost always aligns with something: the patio, a wall, a path, or the axis of a window. Mark it out on the ground with stakes and string, and check that it is square using the 3-4-5 rule (a triangle with 3 m and 4 m sides has a 5 m diagonal) or by comparing the two diagonals, which should be equal. Also consider sunlight (a few hours of sun for the plants, with shade in the afternoon), distance from large trees, and running an electrical cable if you plan to install a pump.
Installation steps
- Mark out the footprint by placing the shell upside down or transferring its dimensions, then add 10 to 15 cm on each side.
- Dig according to the shell's steps, adding 5 to 10 cm of depth for the sand bed. Remove stones and roots.
- Compact the base, then spread the sand and level it with the straightedge and spirit level.
- Set the shell in place and check the level on all four sides and diagonally, using a long straightedge. Correct it by adding or removing sand beneath the shell, never by wedging it on stones.
- Fill and backfill together: 10 to 20 cm of water, then moistened, compacted sand around it to the same height, and so on up to the top.
- Check the level at every stage. It is during filling that a shell may shift slightly.
Polyester pond 200 x 110 x 53 cm - 1,166 L
Rectangular reinforced polyester pond shell, for burying or cladding above ground. Direct pricing and immediate add-to-cart:
Why fill and backfill at the same time
This is the step you would want to rush, yet it is the one that determines success. A straight wall backfilled dry, with the shell empty, is pushed inward and bulges. A shell filled before being backfilled pushes outward and flares. By raising the water and sand together, the two pressures balance and the wall remains straight. The moistened sand also works its way beneath the ledges, where voids would allow the shell to flex and crack over time.
With large shells, or on soft ground, many installers backfill the walls with stabilised sand (sand lightly mixed with cement), which fixes the position once it has set.
| Symptom | Cause | Correction |
|---|---|---|
| Wall bulging inward | Backfill compacted with empty shell | Clear away, fill with water, backfill again |
| Water higher on one side | Shell out of level | Partially empty, raise with sand, check again |
| Ledge bending | Void beneath the ledge | Inject wet sand beneath the ledge |
Finishing a rectangular pond
A rectangle calls for a clean edge: paving slabs, bluestone, boards or architectural concrete. As with any pond shell, the edge rests on an independent support (lean concrete footing or compacted bed) and extends a few centimetres above the water to conceal the rim. For a more natural look, planting socks soften one or two sides without disrupting the geometry.
Plant Socks 10 x 80 cm - Planting Sock
To plant one side of the pond without masonry. Direct pricing and immediate add-to-cart:
What about a large rectangular pond?
Large rectangular ponds are available, up to several metres long, with sufficient depth for fish. They require several people to handle, sometimes with machinery, and require even greater care when preparing the bedding. Beyond that, a brick-built, EPDM-lined rectangular pond is often simpler.
Polyester pond 620 x 170 x 100 cm - 10 540 L
Large one-meter-deep rectangular pond, ideal for a fish pond with a water-mirror effect. Direct price and immediate addition to cart:
Buried, semi-buried, or raised?
A rectangular shell can also be installed half-buried, with wood, brick, or gabion cladding on the above-ground section. This is an excellent solution on sloping ground or for bringing the water closer to eye level. In this case, the above-ground section must be supported by the cladding or retained backfill: the shell alone is not designed to withstand water pressure without external support.

You may also like
The general guide for all shell shapes: How to install a prefabricated pond shell?.
READ THE ARTICLERectangular, round, or free-form shells: send us the space you have available and your garden style, and we will suggest the right model and installation accessories.
Frequently asked questions
— Is concrete needed beneath a prefabricated pond?
No, an even sand bed is sufficient and conforms better to the shape of the shell. Concrete is reserved for the edging and, if necessary, stabilized sand in the backfill.
— My rectangular pond is not level after filling; what should I do?
Partially drain it, clear the lower side, raise it by injecting damp sand beneath the shell, then check again. Do not try to correct it with the edging: the defect will show at the waterline.
— Can the edge extend above ground level?
Yes, one or two centimeters above the finished ground level prevents soil and rainwater runoff from entering the pond.
— How long does it take to install a rectangular shell?
One day for a small shell, two or three for a large one, including filling and backfilling. Allow time for level checks.
In summary
- Hole 10 to 15 cm wider, perfectly level sand bed.
- Check the level on all four sides and diagonally.
- Fill with water and backfill with damp sand at the same time, in stages.
- Edge on independent support, slightly overhanging.
Sources and references
- Installation instructions for prefabricated polyester ponds
- Aquiflor / Foudebassin installation experience, Nodebais (Belgium)
Last updated: September 28, 2026.
Les produits conseillés par nos experts
Voir toute la sélection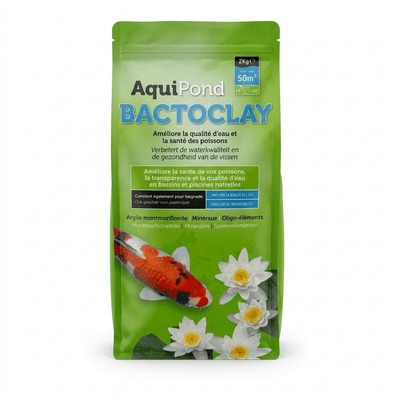 Aquipond BactoClay - Montmorillonite clay 2 kg for koi ponds
€41,95
Voir le produit
 Minerall in One Aquipond - Increases GH & KH simultaneously - 2.5KG to treat 30M³
€51,45
Voir le produit
 Sera Aqua-Test Set - The essential analysis kit for ponds and aquariums
€36,34
 Aquipond KH+ 1kg - Increases Carbonate Hardness (KH)
€20,95


Leave a comment