


Pondovac pond vacuum: choosing a model and maintaining it
2.1 to 2.5 mmax. suction depth depending on the model
2 chambersfor continuous suction
7 stepsof maintenance after each use
Frost-freefor winter storage
Which Pondovac should I choose?
The three models share the same principle: a patented two-chamber system that allows you to vacuum without stopping to empty the tank. The differences lie in power, suction depth and accessories. The values below are those indicated on our product sheets.
| Model | Motor | Max. suction depth | Max. flow rate indicated | Suction hose |
|---|---|---|---|---|
| Pondovac 3 | 1,600 W | 2.1 m | 66 l/min | 4 m |
| Pondovac 4 | 1,700 W | 2.4 m | 5,000 l/h | 5 m |
| Pondovac 5 | 1,700 W | 2.5 m | 8,000 l/h | 5 m |
Our selection guide
- Pondovac 3: small to medium pond, regular maintenance, thin sludge layer.
- Pondovac 4: deeper pond, frequent use, aluminium tubes and various nozzles included.
- Pondovac 5: large ponds, natural swimming pools, large quantities of sludge. It is equipped with an evacuation pump, useful when the vacuumed water needs to be discharged further away.
Measure the depth at the lowest point of your pond before choosing. If it exceeds the maximum suction depth of the model, the suction weakens: this is one of the causes of loss of suction listed below.
For a detailed comparison, read our Pondovac 3, 4 and 5 comparison.
Oase Pondovac 31,600 W · suction up to 2.1 m · 4 m suction hose · 4 tubes, filamentous algae nozzle, debris bag included.See the Pondovac 3 →
Oase Pondovac 41,700 W · suction up to 2.4 m · 5,000 l/h max. · 5 m hose · 4 aluminium tubes, manual power control.See the Pondovac 4 →
Oase Pondovac 51,700 W · suction up to 2.5 m · 8,000 l/h max. · 5 m hose · integrated evacuation pump.See the Pondovac 5 →
Need help choosing?
Tell us the depth and surface area of your pond, we will guide you to the right model.
Call +32 10 86 03 54 View all vacuum cleanersBefore you start: the checklist
A few minutes of preparation prevents most interruptions during the session. Before plugging in your Pondovac, check these points:
- Outdoor socket protected by an RCD, cable in good condition, device placed on dry ground.
- Clean foam, empty debris bag and lid seal properly in place.
- Nozzles within reach: wide nozzle for sludge, nozzle for filamentous algae, brush for the walls.
- Discharge hose unrolled, without kinks, directed towards a flower bed, lawn or drain.
- Large clumps of algae, branches and leaves removed by hand or with a skimmer net.
- Fish refuge areas identified, to avoid them during vacuuming.
- Hose ready to top up the water level at the end of the session.
How to use your Pondovac
- Plug the device into an outdoor socket protected by an RCD. Keep it dry, out of the water.
- Place the discharge hose towards a flower bed, lawn or drain. Sludge-filled water is rich in organic matter.
- Choose the appropriate nozzle: wide nozzle for sludge, nozzle for filamentous algae, brush for the walls.
- Adjust the suction power if your model allows it. Start gently near plants and fish.
- Vacuum by zones, slowly, without unnecessarily stirring up the bottom.
- Monitor the transparent tube: it shows if the suction is consistent.
- Compensate for the removed water by topping up the pond at the end of the session.

Keep the nozzle a few centimeters from the bottom and move slowly: the sludge is vacuumed without being resuspended, and the water remains clearer during the entire session.
When to vacuum the pond?
- In spring, to remove leaves and sludge accumulated during the winter.
- In autumn, after the leaves have fallen, to limit the organic matter that decomposes at the bottom during the winter.
- Occasionally, when a deposit forms in a poorly circulated area.
Avoid vacuuming the entire bottom at once in a pond populated with fish: proceed by zones, over several sessions. This preserves the biological balance and the comfort of the fish. The removed water is replaced by fresh water, added gradually.
What to do with the vacuumed water and sludge?
A Pondovac continuously discharges the vacuumed water, loaded with sludge, through its discharge hose. Decide before you start where it will flow.

- Flower bed or lawn: the water seeps in and the deposits remain on the surface. Move the hose from time to time to avoid puddles.
- Drainage: before discharging large quantities of muddy water into a sewer or ditch, check your local regulations.
- Never into the pond: the sludge would return.
This water loaded with organic matter can be used to water the garden. Its composition depends on what was in the sludge: see it as simple watering, not as a balanced fertilizer. If you have recently treated the pond, read the product label before watering a vegetable patch.
Keep the discharge hose without kinks and avoid placing it too high, otherwise the device will not empty properly. If the water needs to be discharged further away, the Pondovac 5 and its evacuation pump are designed for this. For large volumes, also read how to easily remove sludge from a pond.
Vacuuming and reducing sludge: two complementary actions
The vacuum cleaner removes the sludge already deposited, where the nozzle passes. But organic matter continues to arrive: leaves, withered plants, fish waste, food scraps. It gradually settles, especially in poorly circulated areas.
An addition of bacteria acts between two sessions, on the organic matter remaining at the bottom and in the corners that the nozzle does not reach well. Vacuuming removes, bacteria degrade: the two approaches complement each other.
- Vacuum the accessible deposits, by zones and over several sessions, as described above.
- Treat the remaining sludge with Aquipond Bactovase, a mixture of microorganisms, minerals and trace elements applied directly to the sludge. Choose the format according to the surface indicated on each sheet.
- Limit inputs: remove leaves and withered plants, especially in autumn, and do not feed the fish more than they consume.
To go further: how to avoid sludge in a pond and how to treat sludge in a natural pond.
Reduce organic sludge between two vacuuming sessions
Aquipond Bactovase is the biological complement to your Pondovac: its microorganisms act on the organic sludge remaining at the bottom of the pond.
Discover BactovaseMaintenance after each use
- Empty completely the tank.
- Vacuum a few buckets of clear water to rinse the hose, the tubes and the inside of the tank.
- Remove and empty the debris bag. Rinse it under the tap.
- Clean the foam that protects the motor. Rinse it with clear water until it is clean. Replace it if it is torn or hardened.
- Rinse the nozzles, especially the filamentous algae nozzle, which clogs easily.
- Check the tank and lid seal. A dirty or poorly placed seal causes loss of suction.
- Leave to dry with the lid open before storing.

No bleach. Clear water is enough to rinse the tank, the hoses, the foam and the nozzles. To clean your pond pumps, use a cleaner designed for this equipment, such as OASE AquaActiv PumpClean, never bleach.
Seasonal maintenance
- Before winter: empty everything, dry, store away from frost. Water remaining in the tank or hoses can damage the parts by freezing.
- In spring: check the cable, the hoses (cracks, crushed bends), the seals and the foam before the first use.
- Wear parts: foam, debris bag, seals and nozzles are replaced separately.
Before the spring vacuuming season, also read our guide for restarting your garden pond in spring.
Common faults and solutions
Suction is weak
- Nozzle or hose clogged by algae or a stone.
- Clogged protective foam.
- Lid seal poorly placed, dirty or damaged.
- Cracked suction hose or poorly tightened connection.
- Depth greater than the maximum suction depth of the model.
The device does not empty properly
- Discharge hose kinked, clogged or placed too high.
- Debris bag full.
The device stops or the RCD trips
Unplug immediately. Do not reuse the device. Contact us with your order number, a photo and a description of the problem.
Mistakes that wear out a Pondovac
Most faults can be prevented. Here are the habits to avoid to maintain good suction season after season:
- Vacuuming stones or large clumps of algae: the nozzle and hose get clogged. Remove them by hand or with a skimmer net first.
- Restarting the device with clogged foam: it protects the motor. Rinse it after each session and replace it if it is torn or hardened.
- Storing the device wet or in a room that freezes: water remaining in the tank or hoses can damage the parts.
- Kinking or crushing the hoses when storing: a cracked hose or poorly tightened connection causes loss of suction.
- Insisting beyond the maximum depth of the model: suction drops, regardless of the condition of the device.
- Using a device that trips the RCD: unplug it and contact us before any further use.
Parts and accessories
- Replacement foam for Pondovac 3 and 4
- Replacement foam for Pondovac Classic and 5
- All spare parts for pond vacuum cleaners
For a specific part, tell us the exact model of your Pondovac and, if possible, a photo of the rating plate.
Pondovac 3 Spare PartsFind the spare part for your Pondovac 3 using its reference number.View parts →
Pondovac 4 Spare PartsFind the spare part for your Pondovac 4 using its reference number.View parts →
Pondovac 5 Spare PartsFind the spare part for your Pondovac 5 using its reference number.View parts →
Need advice?
Are you undecided between two models or is your pool vacuum losing power? Describe your pond to us or the symptoms you have observed.
Telephone: +32 10 86 03 54 – Email: support@foudebassin.com. Response within working days.
Frequently Asked Questions
Can you vacuum the pond while the fish are in it?
Yes, by working slowly and keeping your distance from the fish. Reduce the power if your model allows it and avoid vacuuming near hiding areas.
How often should the filter foam be cleaned?
After each use. A clean foam protects the motor and maintains good suction.
Does the Pondovac vacuum filamentous algae?
Yes, using the attachment designed for this purpose. First remove large clumps by hand or with a net to prevent blockages.
Where should the vacuumed water be discharged?
Onto a lawn, flowerbed, or into a suitable drain. Avoid returning it to the pond.
What is the maximum suction depth for the Pondovac 3, 4 and 5?
According to our product sheets: 2.1 m for the Pondovac 3, 2.4 m for the Pondovac 4 and 2.5 m for the Pondovac 5.
Does the Pondovac replace sludge treatment?
No. It removes the sludge deposited where the nozzle passes. Between vacuuming sessions, a bacterial product such as Aquipond Bactovase works on the organic sludge remaining at the bottom. The two complement each other.
Can the Pondovac be left outside in winter?
No. Empty it, dry it and store it away from frost: water remaining in the tank or hoses can damage the parts when it freezes.
Can a Pondovac be used in a swimming pool?
Yes. Our product sheets indicate use for garden ponds, swimming pools, including swimming ponds, and as a household wet vacuum.
Les produits conseillés par nos experts
Voir toute la sélection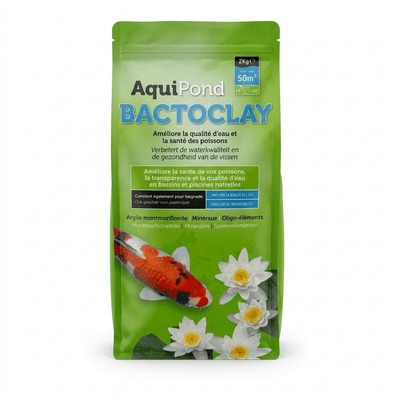 Aquipond BactoClay - Montmorillonite clay 2 kg for koi ponds
€41,95
Voir le produit
 Minerall in One Aquipond - Increases GH & KH simultaneously - 2.5KG to treat 30M³
€51,45
Voir le produit
 Sera Aqua-Test Set - The essential analysis kit for ponds and aquariums
€36,34
 Aquipond KH+ 1kg - Increases Carbonate Hardness (KH)
€20,95


Leave a comment